Creative Embroidery. Follow the steps below.

CREATIVE EMBROIDERY.

Original outlined Drawing on paper. The drawing is approximately 10"X11".

Trace onto light grey organza using a dotted outline.
Using a Sharpie Ultra fine point pen.

The dotted outline is now permanently transferred onto the organza
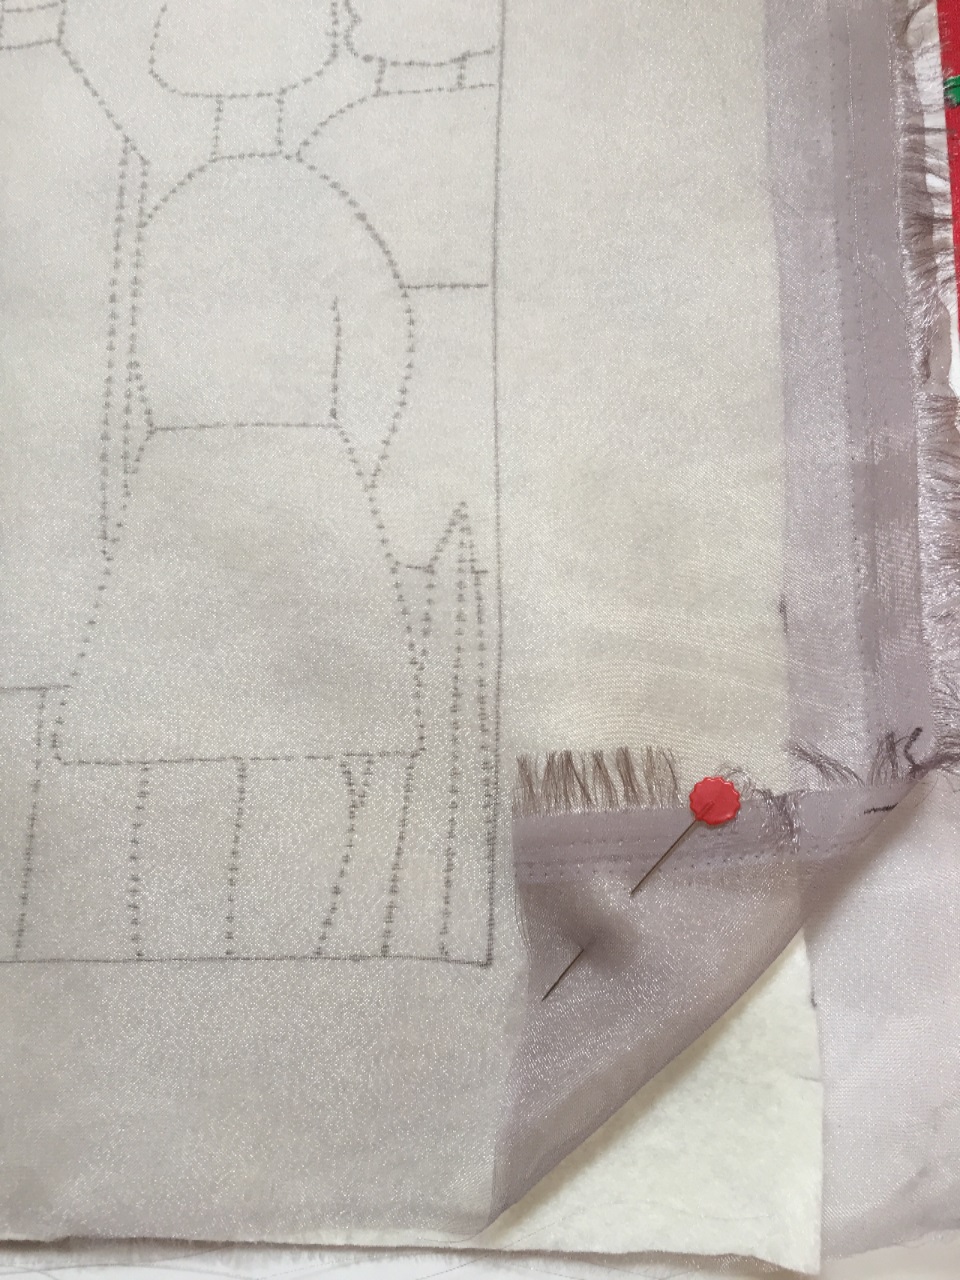
The top layer is the drawing on organza, the next layer is cream felt, the bottom layer is a similar piece of organza to the top layer but unmarked.

Rummage through your box of scrap colourful organza pieces. Select enough to cover the felted area overlapping the edges as seen below.

To create, firstly remove the top drawing layer of organza. Tack the coloured pieces of organza to the felt layer and then re-position the top drawing layer over the top of the colourful pieces. Pin through all layers, include the back layer of organza.
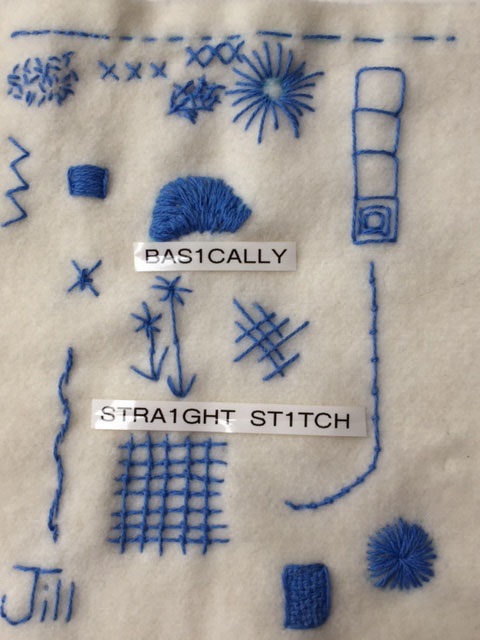
Use hand Back stitch or machine Straight stitch to follow the outlines left by the pen marks. Now the fun part begins. So long as you know a few basic stitches you can create new ones from these. Ideas for stitches to include are Straight Stitch, Couching, Cross Stitch, Fly Stitch, Hand Back Stitch, plaiting, plus variations of straight stitch see diagram above, all of which I used. Threads used were Cotton Broder and Stranded. Plus some Silk ones. Enjoy!

Now the fun part begins, you can now embroider the figures clothing, hair and a bit of background using the stitching I suggested above. You can frame it, or incorporate it into a cushion cover as seen here.
Latest comments
Gracias Jill por compartir. Me encanto!. Tú trabajo es hermoso! definitivamente muy motivador e inspirador.
Thanks Nadia, Lovely to hear that you like it.
Jill, you’re so talented, I had no idea & your artwork is beautiful. xoxo
Dear Claire, so nice to hear that you love what you see. I hear that you are painting full time now and selling all over the world. Go girl!